Thursday 11 September 2014

Tardis Quilt - Secret Project revealed!

At last, I am revealing the Secret Project!

This is my best quilt so far, I am SO amazed by how awesome it looks!


I decided to make this when I found the gorgeous background fabric while browsing an online fabric shop. I saw it and instantly thought "Dr Who!" Then I remembered a very lovely friend who had previously asked if I could make a Tardis quilt. At the time I think I'd only made one or two quilts so my response was "No way! That's far too hard!"

I decided to get Googling and found just a few Tardis quilts. I used parts of most of them for inspiration, but mostly I made the pattern up myself. It was actually pretty simple once I had armed myself with graph paper and coloured pens! My first draft was all out of proportion and would've left me with a very oddly sized quilt! So I started again and the second draft ended up being the quilt that I made!


I was a bit worried about how to do the sign on the door of the Tardis, and the Police Box sign.

In the end I found printable fabric for the sign, and used a google image to print it out. This took a considerable amount of time, because I needed an inkjet printer and our main printer is a laser. I ended up using our old printer that hadn't been used for many years. Turns out, that's because it needed an XP computer, and all of ours are Windows 7! Took me a long while to work that out though! Eventually I decided to try Muv's work laptop, which had XP. The printer started up straight away! However, as it hadn't been used for so long all the ink had dried up! I found one of those kits to refill the cartridges and proceeded to squirt some ink in there. After I'd made a fine mess and covered myself in ink, I attempted to print again, and HUZZAH! It worked! I was really nervous that the ink would just come straight out of the fabric, but I followed the instructions to soak it in water and it didn't colour the water at all! Amazing!


The Police Box sign was made using black fabric and Dylon white fabric paint. I made a template using freezer paper and a Google image of the sign, which I resized using Publisher. I couldn't believe how awesome it looked!

Police Box sign and all my pieces cut out and labelled!


At this point I didn't have any of the blue fabrics, but was desperate to get on with it! I had ordered some fabrics online and was really excited when the parcel arrived. However, when I opened the parcel they were completely wrong! I was devastated! I ended up emailing the lovely people at Minerva Crafts and Fabrics with my dilemma, they were more than happy to help and even had a Dr Who fan on hand to ask for her opinion! They sent me a photo of the fabrics I had suggested, along with a different one that they thought would work a bit better! And it certainly did! The fabrics were totally perfect!

Amazingly the quilt took just a morning to piece! I guess the nice big pieces helped with that! The hardest part was the borders around the panels that are on the door, because I'd never attempted a mitred corner before, but they went pretty well!


One mitred corner done, 5 to go!


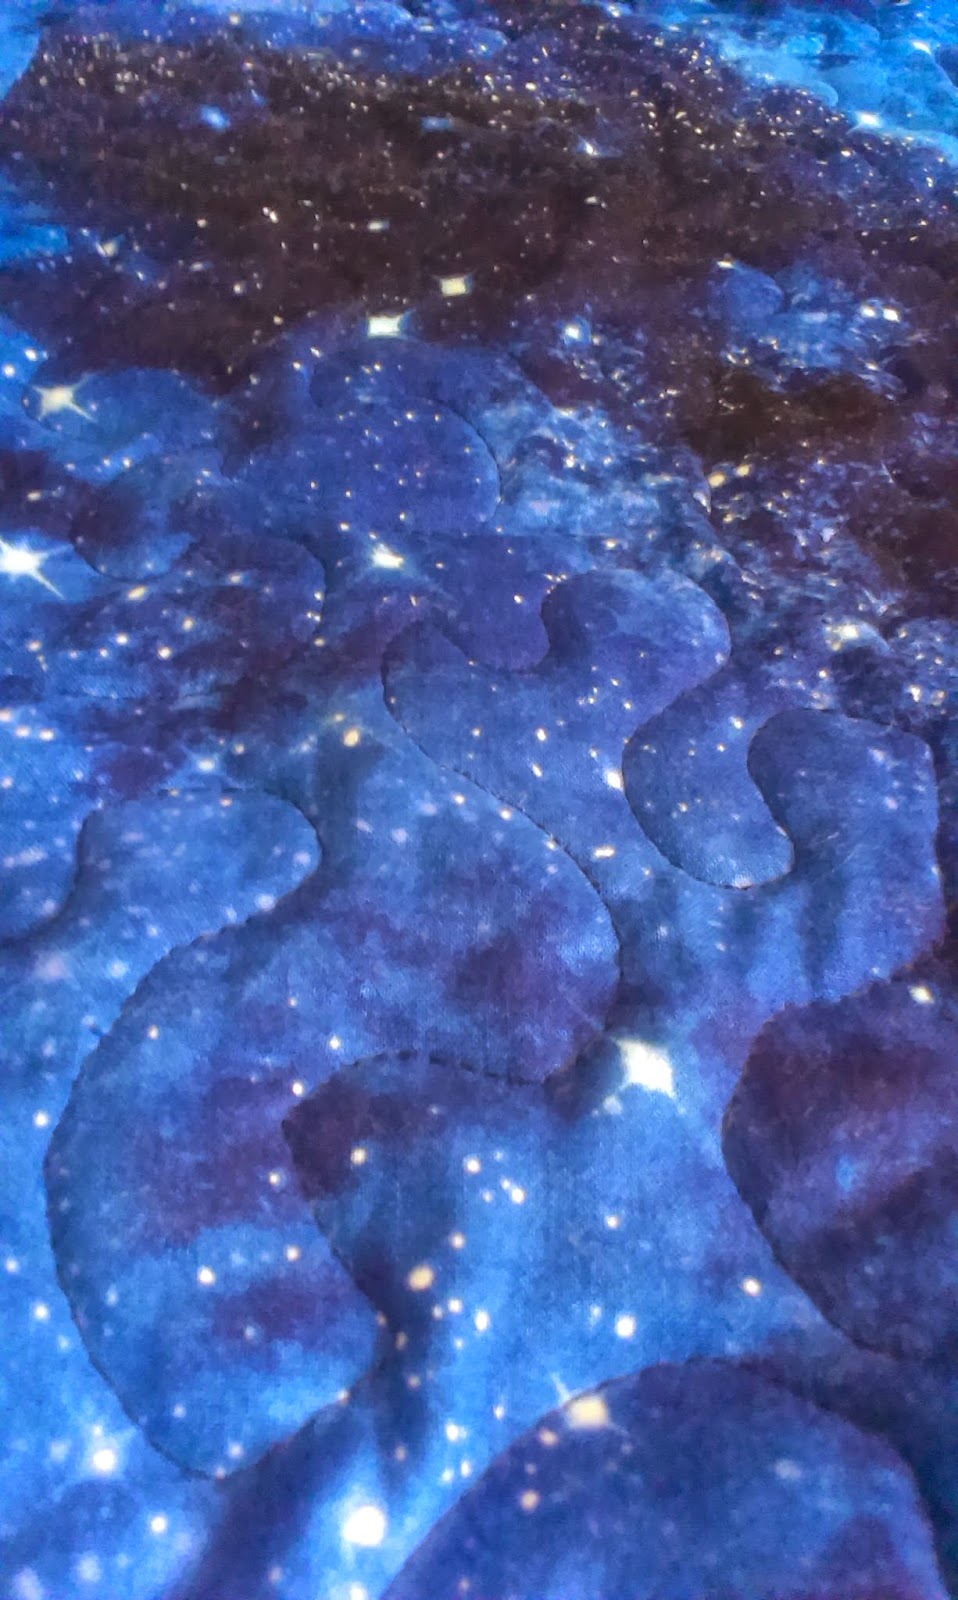
I decided to FMQ this one, and wanted to try and make a wood grain effect pattern for the Tardis. It went a lot better than expected with only a few problems along the way (I'm not going to point out my mistakes, as that way you won't notice them!) 

Close up of the "wood grain effect" quilting


I then started to do a large stipple on the background. This is where I ran into MAJOR problems! The thread was breaking every 30 seconds or so, which was the most frustrating thing I have ever experienced while quilting! I did everything I could think of to try and solve it. I cleaned the lint out of the machine, I changed my needles, I re-threaded hundreds of times, but nothing made any difference! In the end I decided to try the thread I'd used for the Tardis body, which worked perfectly! So I had to rip out everything I'd already done! Argh! It took 4 hours to do the original quilting, 12 hours to rip it out, and 1 hour to quilt the entire thing with the new thread!

The disaster quilting! See those MASSIVE skipped stitches? Bleugh!


The replacement, easy breezy quilting!


So the only thing left to do was bind the quilt. I got that done with no problems and then popped it into the wash to get rid of the 505 basting spray and to be sure that there were no problems. It's a good thing I did because the Police Box sign decided that it didn't want the fabric paint anymore and large sections of it flaked off! I was distraught! I could only think that I hadn't heat set the paint well enough, so I spent a loooong time with the iron after I repainted it. Luckily that seemed to do the trick and it survived the next washing intact!


How upsetting is that!?!?!


So, it was ready to gift to the lovely Fanny! I wanted it to be a complete surprise so arranged for him to come and visit. I set it up on the guest bed that he would be staying in (along with the matching pillowcases). We got a lovely video of him discovering it, but it's a bit sweary so I won't post it!!

Here it is with the matching pillowcases (with a crack in the universe as well!)


Hope you like it :-)

Thursday 4 September 2014

Oh my, it's been a while!

I knew I hadn't posted for a while, but I had no idea it'd been this long! Terrible!

Anywho, I'm back now! And I certainly haven't been idle during these months!
The Secret Project has now been gifted so can be revealed! But that will be for another post. I'm hoping to do a tutorial for it, so that will take me a little while to prepare :-)
I tried my hand at English Paper Piecing, which was not something I had previously considered, because I'm not a huge fan of hand sewing...but my mind has officially been changed on that subject! 
I started the project around the start of June, because the lovely Jessie bought me the book "Hexa-go-go" for my birthday and I also got some free hexagon papers with Love Patchwork & Quilting magazine. I decided to go for the Grandmother's Flower Garden type hexagon project and I am amazed at how lovely it is (If I do say so myself!)


Due to medication changes I have been mostly bed bound and unable to concentrate on machine work, so this was the perfect project for me at this time. It has been my constant companion for 3 months, and it was completed 2 days ago (quilting and all!) It was washed yesterday morning and is still hanging out to dry, but I'm SO excited to snuggle under it :-D
Annoyingly, I discovered (as I was doing one of the last bits of quilting) that one hexagon (out of 1,150ish) had the white on white fabric the wrong way up! So it's more of a white under white now. It was my favourite of the 7 white on white fabrics that were used in this quilt, which made me a bit sad. But hey, we all have our flaws, and now my lovely quilty does too!
I had no idea how I was going to finish the edges of this quilt, and for a while was intending to chop off the edges to make them square. I already knew I wasn't going to use bias binding, no way I was going to deal with all those mitred corners!! In the end, thanks to some help from the Quilting Board, I followed a wonderful tutorial by the blogger BadSkirt. It leaves the lovely hexie edges intact, and no bias binding to deal with. It took a long time, but I'm so glad I made the effort!


I also managed to attend the Festival of Quilts at the NEC in Birmingham. Muv and I decided to go for 2 day tickets so that we could do a couple of hours each day. I'm so glad we made that decision, the first day almost flattened me, so I doubled up my pain meds for the second day and it went a lot better! There were so many lovely quilts on display, and a huuuuuge amount of stalls! I got quite a few bits from the show. I found the perfect backing for my hexie quilt, the exact same bluey/purple batik that I had used on the front, but in extra wide! Awesome!
We found a lovely stall called Monkey Buttons, that had loads of beautiful bag patterns. We were hooked! I think we bought 5 patterns between us, and a couple of fabric packs to make the bags. I have made the "Kangaroo Bag" and I can't believe how professional it looks! It's not quite finished, but all I have to do is bind the inside seams, which shouldn't take too long! The fabric is so lovely as well, I believe it's linen, which had me a little concerned at first, but it was wonderful to work with and really suits the bag.


I also bought some templates for a storm at sea quilt, as that one has been on my bucket list for a while now! It's in the planning stages at the moment and I'm just amazed by the different looks that can be created by just making one little change. Awesome! I'm loving the design sheets available on the Paper Pieces website - so helpful!


I kept seeing the Sizzix Big Shot at the show, and was intrigued. I was able to see one being used and thought it looked pretty awesome! Muv's friend has lent me her machine that she uses for card making. I decided to buy an apple core die so that I could try it out. I didn't want any of the strips or just squares, because they seemed a bit boring! I can see how they would be useful in the future though! I was absolutely amazed at how quick it is to use! I cut out 108 apple cores in just 40 minutes! 


No way I could've done that by hand. Also, there was no pain at the end of it. I would've been in agony if I'd done it with a rotary cutter. The part that took the longest was working out the best way to fold the fabric to get the right cut, with the least amount of wastage. 

Now I'm trying to decide on the best layout for my apple cores, which is taking longer than I thought...or perhaps I'm just trying to put off my first attempt at curved piecing! Haha, I am looking forward to giving it a go though! I think my biggest obstacle is going to be pinning...I'm not a pinner, I'm a shove it through and hope kinda girl!


Remember my post about the Juki Exceed f400? Well...due to a very lovely Muv, I am now the proud owner of the Juki Exceed f600!!!! I call her Juki, she is just the most loveliest of beasts ever! It makes me a bit sad that I haven't been able to use her very much, due to the medication change, but I will get there! I feel we will bond over the apple cores :-)


Anyway, that was the condensed version of the last 3 months of my life, hope you enjoyed it :-)

Monday 12 May 2014

All about ME

Today is ME awareness day so I thought it would be the perfect time to share my ME story.

I became ill at the age of 11, when I had a virus that was suspected Glandular Fever. I don't remember much about that time but I do know that I just never got better again. My mum and I would traipse back down to the doctors many times over the next few years trying to find an answer, but it was always in vain. I was asked several times "Why don't you want to go to school, are you being bullied?", to which I would always respond "No, I wish I could go to school, but I'm not well enough to". I was sent to see counsellors who would ask me why I was there and I wouldn't really know how to answer, because I saw no reason for me to be there. They then referred me to a group therapy for "troubled teens", that was even more of a waste of time - the people in that group had real mental health problems and I had no place being there. I knew I had something physically wrong with me even if noone would admit it! I believe my school attendance was around 50%, yet I managed to leave with 8 GCSEs under my belt. It was around the time that I took my GCSEs that I met a doctor who was willing to suggest that there actually was something wrong with me! 

So, at the age of 16, after 5 long years of having no idea what was wrong with me, I finally had an answer! CFS/ME. I was so pleased to have a name for what was wrong with me. I didn't realise at that point what a difficult diagnosis it is! I was given no medications to try and ease my symptoms, just told to go on the internet and look up "pacing".

So for years I just struggled on. I managed to go to Sixth Form College, although had many meetings with my personal tutor about my attendance, because it had dropped even lower than the 50% of High School. I scraped through with 3 A Levels and 1 AS Level. I had applied to go to University and had managed to get the grades I needed. I had intended to go to Uni after a year off, however, a problem with the name on my results caused me to be put into clearing as it looked like I only had one A Level. That led me to look at the places available on clearing where I saw a course that I really wanted to do - Criminology with Forensic Science (I was originally signed up for Criminology with Psychology). So I called them and managed to blag my way onto the course (I was supposed to have Science A Levels, but I just had GCSEs) and ended up going that year instead of the one after. That was a BIG mistake! I barely made it to any classes, and because I had changed my mind so late about when I was going, I hadn't applied in time for my student loan, so I had no money for the first 6 weeks! The stress of that, and having moved away from home and trying to look after myself on very little energy caused me to have quite a severe flare up and I spent pretty much all of my time in bed, but unable to sleep. I saw the doctor who gave me sleeping pills, which turned me into a zombie. After 8 weeks of not attending classes, I decided I needed to drop out, as there was no way I would be able to catch up on everything I had missed. 

I came back home and attempted to apply for benefits. I was told I was not ill enough to get Incapacity Benefit but I was too ill to get Jobseeker's Allowance...so I got nothing. I still can't really believe that this happened, and if it happened now, I would be sure to appeal this decision, but I was 18 years old and believed what the DWP told me! Luckily my parents looked after me until I was well enough to get a job. I started work in the Science Lab of the School my Dad worked at. They were aware of my condition and because I was helping them out until they got someone permanent, they allowed me to come in on my good days and stay home on my bad days. I managed 3 or 4 days a week most of the time. 

After that job came to an end I got myself a job at Sainsbury's, where I was contracted for 13 hours a week. That sounds like a very small amount, but I really struggled at first. I was working on the rotisserie chicken counter, so the job involved being on my feet for the whole shift, and lugging crates of chickens around the place. It took me a long time to be able to do those 13 hours without too much pain and suffering after each shift! Eventually, I worked my way up until I was working full time, by doing a lot of overtime shifts.

I also moved out to live with my boyfriend at the time. Then came a very stressful year, and as stress is a trigger for this illness, it all came tumbling down again. After the break up I moved back home with my parents and struggled to look after myself. After my previous experience with DWP I signed on for JSA rather than trying to get Incapacity Benefit, as I thought it wasn't worth the fight!

After about 6 months I finally got myself a job with an agency as a temp. I did the job for 6 months, full time and didn't take any holiday - my first big mistake! - and was then taken on as permanent staff. Almost as soon as I was made permanent, I went off sick, because I was completely burnt out. I managed to last 18 months, with various days off sick before I burnt out completely and had the biggest crash of my life.

I am still off sick, it has been nearly 2 years since I first went off sick with a migraine, with new symptoms arriving on a weekly or monthly basis. I have spent the last 2 years mostly in bed, in a lot of pain, with severe problems with concentration, memory and headaches. I fought to be referred to the local CFS/ME clinic, which I didn't know even existed until it was mentioned to my Dad when they thought he had ME as well. Eventually I was referred and had a course of CBT. This left me able to do a lot less than I could do before I was referred, because the first thing I was told to do was to reduce my activity completely. I have not managed to increase my activity from that point. After the CBT I saw the consultant for a whopping 7 minutes in which she asked me if I wanted to go back to work. I responded "That's my main aim". A few weeks after this I received a copy of a letter sent to my GP stating that I was ready to go back to work. I still have no idea how she came to the conclusion that a person who is unable to shower because of the amount of time spent standing up is able to go back to work! I sent a letter back and got no response. 

I then got an appointment through to see the "occupational therapist". I have never in my life met such a rude person. She was very negative towards me, and would make snippy comments about every question I answered. Even if I was doing something right, her response was negative: "That's not too bad!". In the first session she said to me "I think we need to work out why you won't make changes so you can get better, are you just enjoying throwing a sickie?" - I still can't believe that someone who is supposed to help you get better would say something like that! I saw her three times and cried during two of them. The last session made me snap, and I yelled at her...something I'm not proud of, but it did make me feel a lot better! We agreed that there was nothing the clinic could do for me as I needed to get my pain levels under control to be able to do any of the things they were recommending.

So back to the GP, and after 14 years of this illness, I have finally found a GP who is willing to try and get my symptoms under control! He has also suggested that pain I am suffering sounds a lot like Fibro, and having read up on it a bit, I think I agree with him! We have been trying since November to improve my symptoms using medications, and have not been very successful so far, as most medications cause some nasty side effects! I am currently taking Amitriptyline and Pregabalin to try and help with the pain. The problem is that they both cause sleepiness, so I feel a bit like a zombie at the moment. 

I am currently in the process of being assessed for Employment and Support Allowance. You are supposed to be assessed within 13 weeks of your initial claim...I applied in January 2013, and have just had my medical assessment on 7th May 2014. Apparently the decision could take weeks or it could take months. Judging by how they've dealt with my claim so far, I'm going with months! Also, judging by other ME sufferers experiences, I'm fully expecting to have to appeal the decision, which is stress that this body just doesn't need!

I have recently had to make the decision to get a mobility scooter at the age of 25 because without it, I just don't leave the house. Having the scooter means I can walk my dog again, something I have been unable to do for a while now, without causing another huge crash. Having the scooter also means I get to deal with the comments of judgmental people. I have no idea why they think they have a right to call me lazy, when I have never met them before, and they know nothing about me. Perhaps they think it's a really funny joke, but I just wish they would think for two seconds before they open their mouths. What 25 year old in their right mind would use a mobility scooter unless it was actually necessary!?!?! It takes me a lot of guts to get on that scooter and go out into the judgmental world, and I have to work myself up to be able to do it each time.

I am just so glad that I have found quilting, as it is a hobby that I can do in tiny bits, and end up with something lovely at the end! Some days, the thought of sewing is just too much, but I can sit with a notepad and create plans for future quilts.

So, there's a little insight into what life is like right now, and how it has led up to this point. 

If you want to donate to help fund the UK Rituximab Trial for CFS/ME sufferers the information is here:
http://www.ukrituximabtrial.org/IIMEUKRT%20Donate.htm

Part of the #May12BlogBomb

Saturday 19 April 2014

The Secret Project is finished!

I have finally finished The Secret Project and I am SO pleased with it! There have been a LOT of problems with this one but now that it is finished it is amazing!

The unpicking ended up taking 12 hours in total! Ridiculous! It had taken me four hours to sew everything that I then unpicked. It took one hour to re-sew it (and do the other half that I hadn't previously done!) in the Gutterman thread! I think that shows just how annoying the YLI thread was to use! I'm sure it's a lovely thread really, but it just did not get on with my machine.

So I got it all trimmed down and then bound the edges and took some pretty photos (sorry, can't show them yet!) and then popped it in the wash. Took it out and discovered that the area I had used fabric paint on had peeled in places! I was so upset!


I waited for it to dry and then repainted the areas that had peeled. I think that the first time I did it I can't have heat set it properly, so I spent a good 15-20 minutes doing it this time (the bottle advised 1 - 2 minutes!). I left it overnight and then popped it in the wash this morning. I used the handwash cycle because I thought it would be a bit more gentle. Luckily it came out really nice with no peeled patches.

So the Secret Project is finally properly finished! Huzzah!

Monday 14 April 2014

Soldiering on with the Secret Project

So the Quilt Inspector has been whisked off on holiday with my parents for a week and without his distracting ways I have been getting on with things in QuiltLand. 

After my frustration with the FMQing on the secret project I decided to try one more thing to fix the problems...changing the thread. I decided to use the navy blue Guterman all purpose thread that I'd already used successfully on the main body of this quilt. I figured if I had the same problems with this thread then I'd only have a little bit to rip out and I could just persevere with the YLI thread. The Guterman worked like a dream, absolutely no skipped stitches and no thread breakage. I used a full bobbin without ANY problems and then realised I would have to rip out all the YLI thread that I'd spent sooo long putting in.

I think it's the right decision, even though my hand is killing me from using the seam ripper today! I wasn't quite sure that the colour of the thread looked quite right on the fabric and I'm much happier with the navy blue, especially as the stitches are much more even and no hideous parts with skipped stitches.

I'm not finished ripping out the YLI thread but I do feel like I've made a good dent in it! And I can always do a quick stint with the navy blue thread when I get fed up of ripping out stitches! I think if it were any other quilt than this one I would have just soldiered on but this one really needs to be perfect!

Thursday 10 April 2014

I'm in love!

I went to the local sewing machine dealer today and have totally fallen in love! Not with the salesman (although he was a very helpful chap) but with a lovely lovely sewing machine. It's the Juki Exceed Quilt and Pro and it is glorious!

It has everything I want in a machine plus some things I didn't know I want (until now!). The things I was looking for when I entered the shop were: a large throat space, needle up/down, speed limiter. I didn't realise that I wanted a knee lifter (super awesome attachment that when nudged by your knee will raise the presser foot), an automatic needle threader (I have one one the current machine - a Singer Talent 3321 - but never use it because it's awkward and to be honest takes longer for me than if I were to just thread it myself! The one on this machine is fabulous though!), the ability to cut the threads with a heel press on the foot pedal, automatic tension (he went from normal cotton thread, to a metallic thread, to an invisible thread and back to normal without changing the tension and each stitch was beautiful!), a big red light that tells you not to start sewing because the presser foot is raised (!!!) and a screen that shows you which presser foot you need for the stitch you have chosen.

It was truly a beautiful machine and had I had the money available I'm pretty sure I would have walked out with it! At least I now have a goal for me to save up for, as I was so unsure of what I wanted when I was just looking online as you can't really get a feel for the machine. Having seen it in action I am now certain that it is what I am looking for!

Wednesday 9 April 2014

Frustrated with Free Motion Quilting!

I had such a frustrating day yesterday! I was super excited to see that the replacement darning foot had arrived. It looks a look sturdier than the previous one so will hopefully last longer than one and a half quilts!!!

I got it installed nice and quickly and had a quick try on a practice quilt sandwich with the thread that was already on the machine. I was super pleased with it, it seemed to produce better stitches than the previous one. I decided I would get on with the free motion quilting I was in the middle of when the last presser foot broke rather than continuing the piecing on Dilly Quilt.

I changed the thread over to the one I was using for the stippling on Secret Project. It's a grey/blue variegated thread by YLI. I bought it when I was in a different fabric shop to usual and I saw they had different brands of thread than I was used to and I wanted to give it a try. Usually I use King Tut by Superior Threads because that is available to me locally.

I have had SO much trouble with this thread! To start with the main problem I was getting was skipped stitches, and not just one or two...I'm talking 5-10 skipped stitches at a time so I just get a long straight bit of thread. After a few times of ripping out and redoing sections of stitches I went online to search for solutions. The problem is that there are so many possible solutions out there and it's impossible to know which one it will be.

First of all I tried changing to a new needle. I was using a 90/14 and changed for a new one of those. I went ahead and had a go on my practice sandwich which came out fine. As soon as I went back to the project, it started happening again! 

Next step for me to try was to take out the stitch plate and give it a good cleaning! So I did that and got loads of lint out of the machine (so maybe I should have given it a clean before, I just didn't really trust myself to!) and thought to myself, "this definitely must have been the problem". I went back to the project and started again...there were very few skipped stitches, however now the thread decided it would break after about 30cm of stippling! This happened many many times so I then decided to try changing the needle size to see if that would make a difference so I tried a 100/16. This made very little difference and I ended up breaking the thread at least 20 more times before I gave up!

I want to go back to it today and try and sort it out but I'm just not sure I've got the energy for it!

I haven't had any problems with the previous part of this project, in which I did a sort of wood grain effect, but I was using a different thread for that, which does make me wonder if it's just that the thread and my machine don't get along very well...hopefully I will have a bit more luck with it when I do go back to it!

Saturday 5 April 2014

Terrible terrible!

I finally got around to doing a bit more more FMQing today on the secret project and was happily stippling away, thinking to myself, "this is going so much better than the guest room quilt!" when suddenly a small piece of metal landed on top of the quilt...I stopped and looked at it for a bit trying to figure out where it could possibly have come from (and hoping it hadn't come from inside the sewing machine!) as it looked like a piece of a paper clip that had been bent out of shape.

Suddenly it dawned on me what it was, and I don't think I could have been more heartbroken! It was the part of the presser foot that sits on top of the needle bit to make the presser foot go up and down :( so it quickly brought my quilting to an end!


Doesn't it look sad? I was certainly sad! I also certainly didn't expect it to die so soon! I bought it back in November when I was buying a bunch of other presser feet for the project I was doing at the time. However, it hadn't even been used until I did the guest room quilt, so it has lasted for 1 and a half quilts! It was pretty cheap as it was a generic universal type one but I definitely didn't think it would break on me!

I've ordered a new one and have gone for the proper Singer one this time in the hopes it will last a bit better! It certainly looks a bit more beefy than this one. It is around twice the price, but if I manage to get a full 3 quilts out of it then that will make it better value than this one!

I do wonder if perhaps the presser foot was the cause of all the skipped stitches (or it might just be me, I don't know enough about these things to really understand one way or the other!) that I will definitely be ripping out and redoing on this quilt (it needs to be as near to perfect as possible!). I guess I will see when the new one gets here!

5 working days seems like a long time to wait because I just want to get on with it! It was going so well and I am just SO excited to see how it looks in the end. 

I ended up packing away the sewing machine and dipping back into what I am calling "Dilly Quilt", because it is for my Aunty (Dilly). I had sewed the smaller squares together before I did the quilting on the guest room quilt and had attempted to sew four of them together to make the larger squares...unfortunately I thought I could get away with not squaring up my little squares before I did this and ended up so unhappy with the results that I ripped them all apart! It's not often I will actually bother to rip things apart (due to laziness) so that shows that they looked pretty awful! So I've squared them all up now and will hopefully attempt to stitch them together again tomorrow, depending upon how I feel when I wake up!

Sunday 30 March 2014

My First Real Adventure in Free Motion Quilting

I recently finished a quilt top that I made from a Moda Jelly Roll. I wasn't all that happy with what I ended up doing but at the time I just didn't have any real inspiration for it. Basically I made squares using 3 strips of each fabric (I had originally intended to mix up the different fabrics but really struggled to get a layout that looked right) and bordered them with white fabric.

The end result was actually quite fun and fresh, with the lovely crisp white borders and the bright colours from the jelly roll. The quilt ended up pretty huge, and naturally I decided it was the perfect one to do my first ever free motion quilting on (I don't like to start small!). I honestly wasn't sure how on earth I was going to manage to get this quilt through my machine as the throat of the machine is pretty small and I actually did quite a bit of research with the idea of getting a new machine that would make everything a bit easier. After my research I realised I'd be saving up for quite a long time to get one of the machine's I wanted so went back to my trusty machine.

For my first quilt, I had managed to machine quilt it by rolling it up into a huge sausage, but that was for simple stitch in the ditch quilting and I didn't think that would really work for this one. Also, that sausage of quilt gets pretty heavy and I didn't fancy wrangling with one on this massive quilt! I had read somewhere online that some people basically just smoosh the quilt into the throat as they go. I thought I might as well give that a go, as if others can do it then I surely can too! 

I also read that I should get the trickiest part done first. As the quilt was 9 squares by 9 squares I would have to get the 9 central squares done first. This was definitely the hardest part, it made my arms ache so much trying to get all that quilt smooshed over into the throat. I marked the central area using quilter's tape, as I thought it would be easy for me to forget where I was and end up doing something the hard way that could have been so much easier! I had decided on stippling for my first go as it is apparently the easiest method to learn first. So I got the middle all done and thought I'd try the outer edges to see if they were more manageable, and I soon got into the groove! Before I knew it, I had finished 5 of the 9 areas I had mentally mapped out on the quilt. I had a bit of a stretch and then glanced up at the machine and to my horror I saw this:


There is nothing worse than seeing this sight when you don't have any more thread! I sucked up my disappointment and decided I would just have to take a trip to the shops in the morning. I also decided that I would invest in some more bobbins as one of the best tips I found was to pre-fill a bunch a bobbins so that when one runs out you can just pop a new full one in without having to refill them and break up your quilting momentum. I only had two bobbins that were nearly empty when I started so kept having to stop to refill and it did get annoying!

I'm actually pretty glad that I did run out of thread as I'm sure I would have carried on until I finished. The amount of pain I felt in my shoulders that night was ridiculous! It reminded me of the pain you get in your arms when you paint a wall and you haven't done it in a long time!


So this was my first section of stippling, along with the quilter's tape. I think it looks so much better than it does on the section where I haven't done any quilting so this picture made me feel pretty happy. It also made me realise that my FMQ looks a lot better from a distance than it does close up! I have REALLY got to work on my hand/foot coordination! There are some really long stitches and some really really tiny ones! I have considered ripping out the really bad areas and redoing them, but I think I will actually keep it as it is, so that as I get better at FMQ I can see my progress by comparing it to this one. Also this quilt is for our guest room so it won't get used that often. Also, despite it's flaws, I'm still pretty proud of this one!


The next morning I ventured out into the world to get myself some more thread and some new bobbins. I may or may not have also ended up buying a book of quilt blocks while I was there! I got home and got straight on with it!

I whizzed through it as I was getting a bit more confident with moving the fabric. I realised at this point that as I moved the fabric around I was ducking my head around, up and down and to the side with each squiggle I drew. It really reminded me of playing on racing games on the xbox, as I am unable to stop myself turning the controller as I go round corners (it definitely helps you get round them better!)


And pretty soon it was all done! Hurrah! My first attempt at FMQ all finished and looking lovely! Now I won't let myself look at it too closely because it is so inconsistent, but I love it (from afar). 

Now all I had left to do was to trim off the excess background and wadding and get it binded! So I started trimming away and as I turned the quilt around to get at another side, tragedy struck! The open scissors in my hand caught the quilt right in the middle and cut a little V shape right through all three layers! I don't think I could have been more upset at this point, to go through all that hard work and ruin it simply by not thinking before I acted! I decided the only thing I could really do at this point was to satin stitch the hole closed. So now there is a satin stitched V right in the middle of my quilt! If this was a quilt that I was giving away I think I would have had a complete meltdown, as there's no way I would be able to give someone a quilt that I had ruined like that!

But anywho, there was no point in crying about it, the quilt still needed binding. I had chosen a light purple backing for this one so went for a darker purple binding, as it would pick out some of the colours in the quilt. So here it is, in all it's glory:


And here is the approval of the quilt inspector:


That looks like a thumbs up to me!

Tuesday 25 March 2014

Cutting out pieces

I've been pretty poorly for the last few days because naughty Muv has given me her cough. To normal people a cough is nothing much to worry about, but when you team it with ME/CFS it is an absolute misery. All my symptoms have flared up in a rather dramatic way so I have been spending a lot of time in bed in a lot of pain and unable to do much apart from nap and maybe read a book.

Luckily, before the cough reared it's ugly head, I managed to get a bit of quiltyness in! I've had the fabric for this one for a little while now and wasn't really sure what to do with them (apart from knowing who the quilt would eventually be for). I finally settled on quite a simple plan for this one. As there are four different prints in four different colours, I will make small squares out of 4 strips and then make those smaller squares into larger ones so that all 16 fabrics are included in each square.

It took quite a bit of maths for me to work out the size of the strips (when my brain isn't working due to the ME/CFS maths can be quite a struggle!) and I eventually settled on strips that were 1 3/4" wide and 5 1/2" long to make 5 1/2" squares when 4 are joined together. So I set about cutting them out. I had worked out I needed 36 strips of each fabric. In my calculations I had used 18" x 22" as the size of the fat quarters (information I found online somewhere). Unfortunately that included the selvage along one edge, so where I had worked out I could get 4 5 1/2" strips from the 22" long section, I could actually only get 3!

AAH! Panic set in at this point as I had cut out 2 whole pieces of fabric before I realised! I set it all aside for a while as I needed to have a think about what to do. I knew I could make 30 of the big squares instead of 36 but that would shrink the size of the quilt by quite a lot and I am determined not to make anymore quilts that are too short! Eventually I managed to work out that I could make the strips 1 5/8" wide and 5" long. So I got to work and soon had all the fabric cut into lovely little piles of strips ready to be sewn :)


I had bought the fabrics as bundles from Fabric Rehab but in the bundles there was a different print included in the purple pack than in all the others, so I had ordered another one of the sketch fabrics from them to try and get them all the same pattern. I wasn't really happy with it though as I had to get a pink one rather than purple as they didn't have it (which is obviously why there was a different one in the purple bundle). After I had cut them out I was looking around online and found a purple version of sketch at Backstitch and was overjoyed! I ordered it on the 18th and it arrived here on the 19th! Amazing service! They have lots of lovely fabric that I wish to own as well so I'm pretty sure I will be back there soon! I haven't yet cut out the purple sketch so the photo has the pink one rather than the purple.


Saturday 15 March 2014

Purple Quilt

When I finished this quilt, I was so proud of myself. I'd decided I wanted to do something a bit harder than just joining squares and rectangles together so I chose Half Square Triangles. After a lot of Googling to find a pattern I liked I came across the "Walkabout Quilt" and thought it was perfect! It looked reasonably simple and I went about drawing out my pattern. As I wanted it to be about the size of a double duvet I added an extra row of pieces all around the original design.


I then went down to the local fabric shop and bought up most of their purple and white fat quarters. The whites are all different white on white prints. I believe I ended up using 6 white fat quarters and 6 purple ones.

I then spent quite a while looking up how to make half square triangles and discovered there were many ways to do it. I couldn't work out how to make sure they would be the right size so ended up just guessing really! I used the method that makes 8 half square triangles out of each square of fabric shown here and as I only needed 16 of each fabric I only had to cut out 2 big squares from each colour of fabric. Pretty simple so far!

I had randomly purchased 2 metres of a beautiful purpley batik fabric from Doughtys (they have an awesome selection of batiks!) in a previous order and thought it would be perfect for the other squares. As I was kind of making it up as I went along I realised I needed to sew together all the HST squares to make them into arrows before I knew what size the plain squares needed to be. So pretty soon I had 24 lovely purple and white arrows piled up waiting for their batik squares. So I cut out 25 squares from the batik fabric (I can't actually remember what size they ended up being!).

I then used my special sticky fabric thingy to lay them all out and had pretty soon sewed it all together. I realised at this point that it would definitely need a border to make it a useable size. I got back online and ordered two different purples as I thought I wanted to do a lighter border and then a darker one round the edge of that. I also ordered the backing fabric at the same time in the darker purple (but they had it in extra wide so I didn't have to sew the backing together).

Once it all arrived I realised that the quilt would look far too busy with the two tone border so I plumped for just using the darker fabric. Unfortunately I had ordered the fabric based on using both, so when it came down to it I ended up with another quilt that isn't quite big enough even though I made the border a big as I could with the fabric that I had! I didn't realise about the size until I was finished quilting it though and thought I had just about managed to get it right!

As the hand quilting had gone so well the time before I decided to have another crack at it with this one. I decided to quilt 1/4" from the seams in the arrow squares with purple thread on the white sections and white thread on the purple sections. I wasn't really sure what to do with the batik squares until I stumbled across this template and thought it would be perfect! The template is great, the only slight problem I have now is storing it because the pieces don't like to stay together and ended up spread all over my box of quilting supplies!

I played around with different ways to mark the quilt top for quilting. For the arrow squares I used quilter's tape which worked out really well (although I did end up using more than one roll of it and I'd only purchased one in the first place so had to wait for delivery on another one!) and I liked that it didn't actually mark the quilt. For the wavy squares on the batik section I realised I would have to mark the quilt as I had no other way of doing it! I ended up using one of those blue water erasable quilt markers which did work out but I would definitely recommend testing that they do erase from your fabric before use.

For the border I thought I wanted to continue the wavy lines theme and had seen people online using a wavy line template for their border. I searched and searched online to try and find somewhere that sold the template in the UK. But it was all in vain, there was no template for me! So I ended up making my own template. It worked out a lot better than I expected to, although I did have several attempts at making the template! I started out trying to use a laminating pouch by putting it through the laminater and then cutting it out with a craft knife. This sort of worked but the plastic was very flimsy and floppy and I had basically printed out a picture of the template available in the USA and copied it. It ended up with very small waves that were too close together. I tried again doing it this way but just wasn't happy with the results. 

Whilst in the local fabric shop I noticed they were selling template plastic sheets with a grid printed on. I thought this could work so I bought a pack (I believe you get 2 in a pack) and headed home to fashion myself a template. Rather than using the print out I had already tried I decided to use the edge of the largest of the wavy squares templates. This worked really well and because the plastic had a grid on it I could make sure I had them evenly spaced. So I ended up with some lovely wavy lines all along the length of the border and wavy squares in the batik corner sections.


The quilting took maybe 3 - 4 weeks on this one as it was a bit more intense than my previous one but I love the way it turned out! I used Hobbs Heirloom 100% wool batting for this one as I wanted to try out something different (I had previously used 50% cotton 50% bamboo and 100% cotton). I actually really like the wool batting. I was really worried when I first opened the package as it looked like it would fall to pieces if I as much as blew on it, but I gave a soak in the tub before I used it and hung it out in the sun to dry and it survived that so I felt a bit better about it after I did that! I love the way the quilting stands out with this wadding. It makes it look almost puffy compared to the cotton and cotton/bamboo ones as they are so flat in comparison.

Lessons learned in the making of this quilt:
  •  Wool batting is actually rather nice and not at all scary!
  • Patterns can easily be adapted for whatever your needs
  • Hand quilting gets better and easier with time 
  • Template plastic is a pretty handy thing to have around

Friday 14 March 2014

Free Motion Quilting Practice

So I managed to get a bit of practice in today free motion quilting. It didn't go all that well, but I did learn a few things along the way! For example, make sure you lower the presser foot before you start sewing, otherwise this happens:


As soon as I worked it out it all made sense why the sewing machine was making a hideous clunky grindy noise! So I put the presser foot down and all was well. It's kind of annoying that the free motion foot doesn't look any different when it is down to when it is up, so I may have made the same mistake again later on in the practice session! 

So I attempted to do a wood grain effect type thing but I'm not sure it looks right...I don't know what it is about it that I don't like but I think I will try a few other ways to do it before I do the real thing.


Maybe the lines need to be wavier than they are? I did this whole bit and then realised that I had forgotten to cover the feed dogs. I put the cover on to do the little "detail" parts and then the tension went all screwy so I don't like the way those bits look at all. 

I decided to have a play with the tension and do what I've seen on other blogs where you mark the fabric with the tension for each piece of sewing and ended up with this:


I think I'm probably going to end up having the tension between 3 and 4 as those are the ones that look the best.

One thing I really wished as I was doing all this was that I had one of those machines where you can program it to stop with the needle down. It would have made it so much easier!! Also I wish it had a speed control thingy so I could set it to a medium speed and it wouldn't matter if I accidentally pressed too hard on the foot pedal!

This took me about an hour to do so goodness knows how long the real thing will take me! Although I did have to mess about changing the presser foot over and then back again at the end so that Muv can use the sewing machine. I did also have to take the little metal plate thing off when I forgot to lower the presser foot (again) and ended up with a huge tangle stuck under it!

After I'd done I decided to take photos straight away so I wouldn't forget so I laid it out nicely on my bed and this happened:


So after I'd finished with the photos I folded it up and gave it to him as a pillow! At least he appreciates my efforts :)


Energy levels decimated

So I spent the whole of yesterday in bed, recovering from the day I spent making the Secret Project Quilt Top. I guess I got a little over excited making it and just couldn't stop. Looking back on it now, I should have stopped when I finished the quilt top at around lunchtime, but at the time it seemed super important to make those pillowcases and practice free motion quilting.

I'm feeling a little better today (still exhausted, but not completely incapable) so will hopefully have another practice at free motion quilting again this afternoon.

From the little practice I had the other day, I need to focus on tension, the speed I move the quilt sandwich and the speed the machine is going...so pretty much everything you need to free motion quilt!

I was hoping to have a practice on another quilt top that I've made before doing the Secret Project Quilt but I don't think that going to happen now that the quilt top is made! I told you I'm not very patient!

So hopefully I'll be back later with some pictures of my free motion attempts! I think I'm going to go for stippling on the background area of the quilt and try a sort of wood grain effect for the main body...if I can manage it that is! We'll have to see how it goes!

Wednesday 12 March 2014

Jigsaw Quilt

So Jigsaw Quilt was my second quilty creation and was made for my Sister, Tozzi (not her real name!). I made it using a Jelly Roll that I ordered online from Doughty's. I saw the Jelly Roll and thought it would be perfect for a quilt for her as it was beautiful rainbowy colours. It ended up being a lot less rainbowy than I imagined (not the jelly roll, the quilt!).

I had spent quite a while Googling "Jelly Roll Quilts" after it actually arrived because I was suddenly struck with the thought "What the hell am I going to do with this?". I stumbled across a lovely picture of a quilt that looked like it was made up of jigsaw pieces - I believe it can be found here - and decided to give that a go. 

As my first quilt hadn't involved any need to lay out the pieces (due to my lovely map) I wasn't sure where to start with deciding where things were going to go. I was having a casual browse at the local fabric shop and spotted a special sheet for laying out quilt pieces. I thought to myself "Why do I need a special sheet? I'll just use an old sheet from at home." Well that didn't go too well as I ended up crawling around the floor while the dog tried to bite my nose (If you are on the floor, you must be trying to play!). I think I laid out about 10 pieces before I gave up on that one!

I decided to head back to the shop and invest in the special sheet. I'm really glad I made that decision now as it means I can pack everything away when I run out of energy mid-sew and not worry that the dog will jump all over it and steal bits of fabric. I can't remember what it was called or who makes it but its basically a sheet of fabric that other fabrics will temporarily attach to without any need for pins or glue! It comes with a huge sheet of slightly waxy paper that you put over the fabrics before you fold it up (so you don't end up with fabrics stuck to the wrong side of the sheet when you unfold it!).

I laid out the strips and squares that I had made but couldn't really find a way to do it that I liked, so I ended up moving things around a lot (which was a lot easier with the sheet thingy on a double bed so the dog couldn't steal my nose!) and eventually gave up and folded it all away. When I came back to it several weeks later I decided that actually it looked ok apart from a few parts where there were samey colours together so I sorted that out and I had my layout!


It sewed together pretty quickly and with only a few errors along the way (sewing along the rows and putting things the wrong way up was the main issue I had!) and pretty soon I had myself a (rather small) quilt top. 

I then decided to try my hand at a border to make it a useable size. I didn't really plan the border other than "I want this quilt to be big", which may have been a mistake now that I look back on it! I happily sewed it on, not really knowing what I was doing. Once it was all done I popped it into the washing machine. I was horrified (how naive!) upon removing the quilt to find that the black border fabric had greyed all the beautiful rainbowy colours, and that all the oranges were now dingy brown! I was so upset! All that hard work and I'd ruined it simply by not prewashing!

After the heartbreak I set about making my "quilt sandwich". This was a lot trickier than with my first quilt, mainly because the first quilt is about the size of a long single duvet and this was more of a double bed size. So the quilt sandwich making involved clearing most of the furniture in our living room up to one end and crawling about (I am not a natural crawler!) all over the place to spray baste it.So eventually I finished up with all the crawling and the quilt sandwich was ready! Hurrah! 

Whilst pootling about on the internet I had found some quilting templates. I found one that reminded me of waves and thought it would be perfect for my border! What I didn't really think about when I bought it was how I was going to get this lovely looking stencil stitched nicely onto the quilt. As I had only ever machine quilted in (not so) straight lines I thought machine quilting would probably not be the answer to my conundrum, so I decided to hand quilt it.


The thought of hand quilting terrified me to start with, but naturally the wonderful world of quilty bloggers sorted me out on that one! Nothing to worry about! So I popped down to the shop and bought thimbles, needles, thread etc. and returned home to get stuck in. I decided to stitch in the ditch around all the puzzle pieces in the main part of the quilt. I set about trying to use the thimble I had bought. I didn't realise anything in the world could be as complicated as trying to use a thimble! My finger just couldn't get in the right place to actually use it so I gave up on that after many frustrated minutes! I spent quite a while looking it up online and still was none the wiser as to how it would actually work. Eventually I stumbled across a blog where the person had the same issue as me (weird fingers, maybe?) and they had eventually found one that they could use. "Hurrah!" I thought and eagerly clicked on the link. Only to find that it could only be bought from Australia. I looked around for a bit longer and eventually decided to just go for it and ordered the thimblelady thimble.

Now, I'm not a very patient person so I decided to carry on hand quilting the jigsaw pieces and hope that the thimble (and accompanying book on "how to hand quilt without pain") arrived before I got to the swirly waves on the border! The result of this is some very large, very wonky hand quilting around the puzzle pieces and it also resulted in a hell of a lot of pain in the muscle below my thumb! The thimble did indeed manage to arrive before I started on the waves and came with a practice pattern for me to try my new thimble out on. I'm very glad it came with the kit as I could see my hand quilting improving very rapidly as I completed it! I can't say that hand quilting is completely pain free with the thimblelady thimble, but there is no way I'd have managed the swirly waves as well as I did without it! 


I think the hand quilting took a couple of weeks to finish (it's very simple hand quilting). My next mistake was about to happen (obviously I didn't know it at the time) when I decided to trim the border down a bit to make the swirly pattern more central in the border. I trimmed off quite a bit and it turns out the quilt is now too short to keep my whole Sister warm at night, giving her either cold feet or cold shoulders. Very upsetting! But on the positive side, a lesson learned (or was it?)!

Lessons learned in the making of this quilt:
  • Prewash fabric!!!
  • Make the quilt to a specific size, and stick to it!
  • How to hand quilt

Secret Project Quilt Top Finished!

So, I received the fabric yesterday and got it straight in the wash (I have had some bad experiences where I haven't prewashed so realise this is a must now!). By the afternoon it had had a few hours hanging in the airing cupboard to dry and was ready to be ironed. So I stood and ironed all the fabrics - normally I hate ironing but there's something lovely about ironing a fresh new piece of fabric that's about to be turned into something awesome! Once it was ironed it seemed a shame to not start the cutting out so I went ahead. By around 8pm I had a few bits done and decided to call it a night.

I woke up early this morning because my room was too hot so decided to get on with it. By around lunchtime the quilt top was finished! Amazing! I made several mistakes along the way but everything worked out ok in the end!

I had quite a bit of fabric left so I decided to make some matching pillowcases to go with it.

I quite literally can't believe how awesome it all looks. And that I actually created it all!

I've decided to have a go at free motion quilting on this one and had a little practice this afternoon...it wasn't great but I shall do a lot more practice before I have a go at the real thing! I am tempted to pop down to the local fabric shop to get the wadding and backing but I worry that if I have that available to me, I won't be able to stop myself doing it for real!

Tuesday 11 March 2014

I'm Excited!

What is the cause of this excitement? The fabric for my secret project arrived today! It's gone straight in the wash so will hopefully be dry and ironed ready for tomorrow so I can finally make a start on it! Huzzah!

This is the second lot of fabric I have bought for this project, the first lot looked perfect when I ordered them online but when they arrived I was terribly disappointed as they just weren't right - what I had ordered as a dark blue fabric turned out to be a bright turquoise! And when I reveal the secret project you will understand that bright turquoise just wouldn't do. Luckily Muv decided that the turquoise would work for one of her projects so I didn't have to go through the annoyance of sending it back!

I then went online to Minerva Crafts and Fabrics who had helped me with enquiries previously and the sales staff couldn't have been more helpful. They checked the fabrics I enquired about and even sent me photos of them all on the table next to each other so I could be sure that they worked together. Fabulous service! 

I also received the background fabric today all the way from America. I wasn't expecting to receive it until around the 18th so I'm super excited to have it a week earlier! This also means it will be prewashed at the same time as the other fabric so I can plough right on through to the finish :)

Monday 10 March 2014

Quilty Number One

As this was a finished product when I decided to start this blog, all photos are of the completed project. Hopefully any new projects I will remember to take pictures along the way!

Looking back on my first ever quilt now makes me realise how unprepared I was to enter the world of quilting! I had never heard of a rotary cutter, quilter's rulers or a walking foot and had very little knowledge of seam allowances. Hence my first quilt has many many imperfections. However, I love it. Simply because it is my first quilt (and it is rather beautiful despite it's flaws).

The quilt began it's early life when I stumbled across the website Fabric Rehab  and fell in love with many of the wonderful fabrics they sell. I purchased one of their fat quarter bundles and gleefully awaited it's arrival. After I placed the order I realised that they had an actual shop a mere 25 minutes away from me! Unfortunately due to my illness I have still not managed to visit the actual shop, but I live in hope that one day I will manage to trick one of my family members into taking me there! The fabric arrived really quickly and I quickly realised that these "fat quarters" weren't going to get me very far in making my first quilt! 


I spent a lot of time planning it, I drew myself a lovely colour coded map which was absolutely invaluable! Unfortunately I didn't think to use graph paper - that would have been far too easy! Once I had planned it I knew how many fat quarters I would need in the end and hurriedly ordered some more. If memory serves me correctly I ended up using 15 fat quarters in total (5 pink, 5 blue and 5 green).

As I had no idea what a rotary cutter and cutting mat were, I painstakingly drew around a cardboard template I had made to get 25 squares out of each fat quarter. I then sat and cut each of those squares out using a pretty blunt and painful pair of scissors (lesson learnt!). Once I had done that I had 15 lovely (and maybe slightly wonky) piles of fabric.

I followed my map and ended up with 25 strips of joined together squares. I wish I had learnt how important seam allowances are before that point, as when I joined the strips together there were an awful lot of places that should have joined but didn't! Although with the cutting out method I used, I'm not even sure seam allowances would have helped!

  So I joined the strips together and suddenly had myself a completed quilt top! Amazing! Then it struck me that I had absolutely no idea how to quilt it, or even what that meant! So I hopped onto Google and the wonderful quilty world helped me out! I discovered I needed a walking foot for my sewing machine, something called wadding, backing fabric and some binding. I quickly ordered my self a walking foot and got myself down to my local fabric shop (right in the village where I live, awesome!). Before I went I had read many many descriptions of different types of wadding, but still didn't really know what I wanted. I ended up going by feel and decided on the Sew Simple 50% cotton 50% bamboo wadding as it was the softest (and most expensive) one they had.

 I decided to machine quilt my first one as the thought of hand quilting made me want to be sick! I'm not much of a hand sewer and am not the most patient of people so thought this way would be quickest. So I got back onto Google to find out the easiest way to machine quilt. After a lot of reading I decided I would keep it simple and "stitch in the ditch". So I dutifully rolled my quilt up into a sausage and started stitching away.


I mostly managed to stay in the ditch but this was pretty difficult for me and I think I ended up doing everything a bit too fast and therefore it's not very accurate! I had decided on a purple binding as I didn't want to use any of the colours already in the quilt (might have been a weird decision now that I'm writing it down...) so I also used a purple quilting thread. It was a variegated thread but I don't think there was much need for that as you can't see any of it! I also plumped for a purpley pinky mottled backing fabric which reminded me of clouds at sunset.

I thought I would struggle with the binding as I'd never done it before but it was actually a breeze! I used a very helpful tutorial found here. I don't think I would have managed it half as well without it!

Lessons learned in the making of this quilt:
  • Buy a rotary cutter and quilt ruler(s)!
  • Use graph paper for quilt planning
  • Be more patient when using the sewing machine 
  • Make use of online tutorials